Setting the correct temperature for the filament is not easy for the new user.
Most brands of the filament will add this value to their tags. Simple example: PLA(190-220℃). But the critical point is this value ranges too much. We don't know the best "number" for our printer. And this post will tell you a method to find the best "number" for your printer with some time and a few gram filaments.
Prepare
Before we start to make the temperature tower file. We need to prepare something to ensure this file's success.
Method
You need to Quickview this pic then you can know what we should do actually.

Steps
We are using the Cura slice software as the simple
Load stl
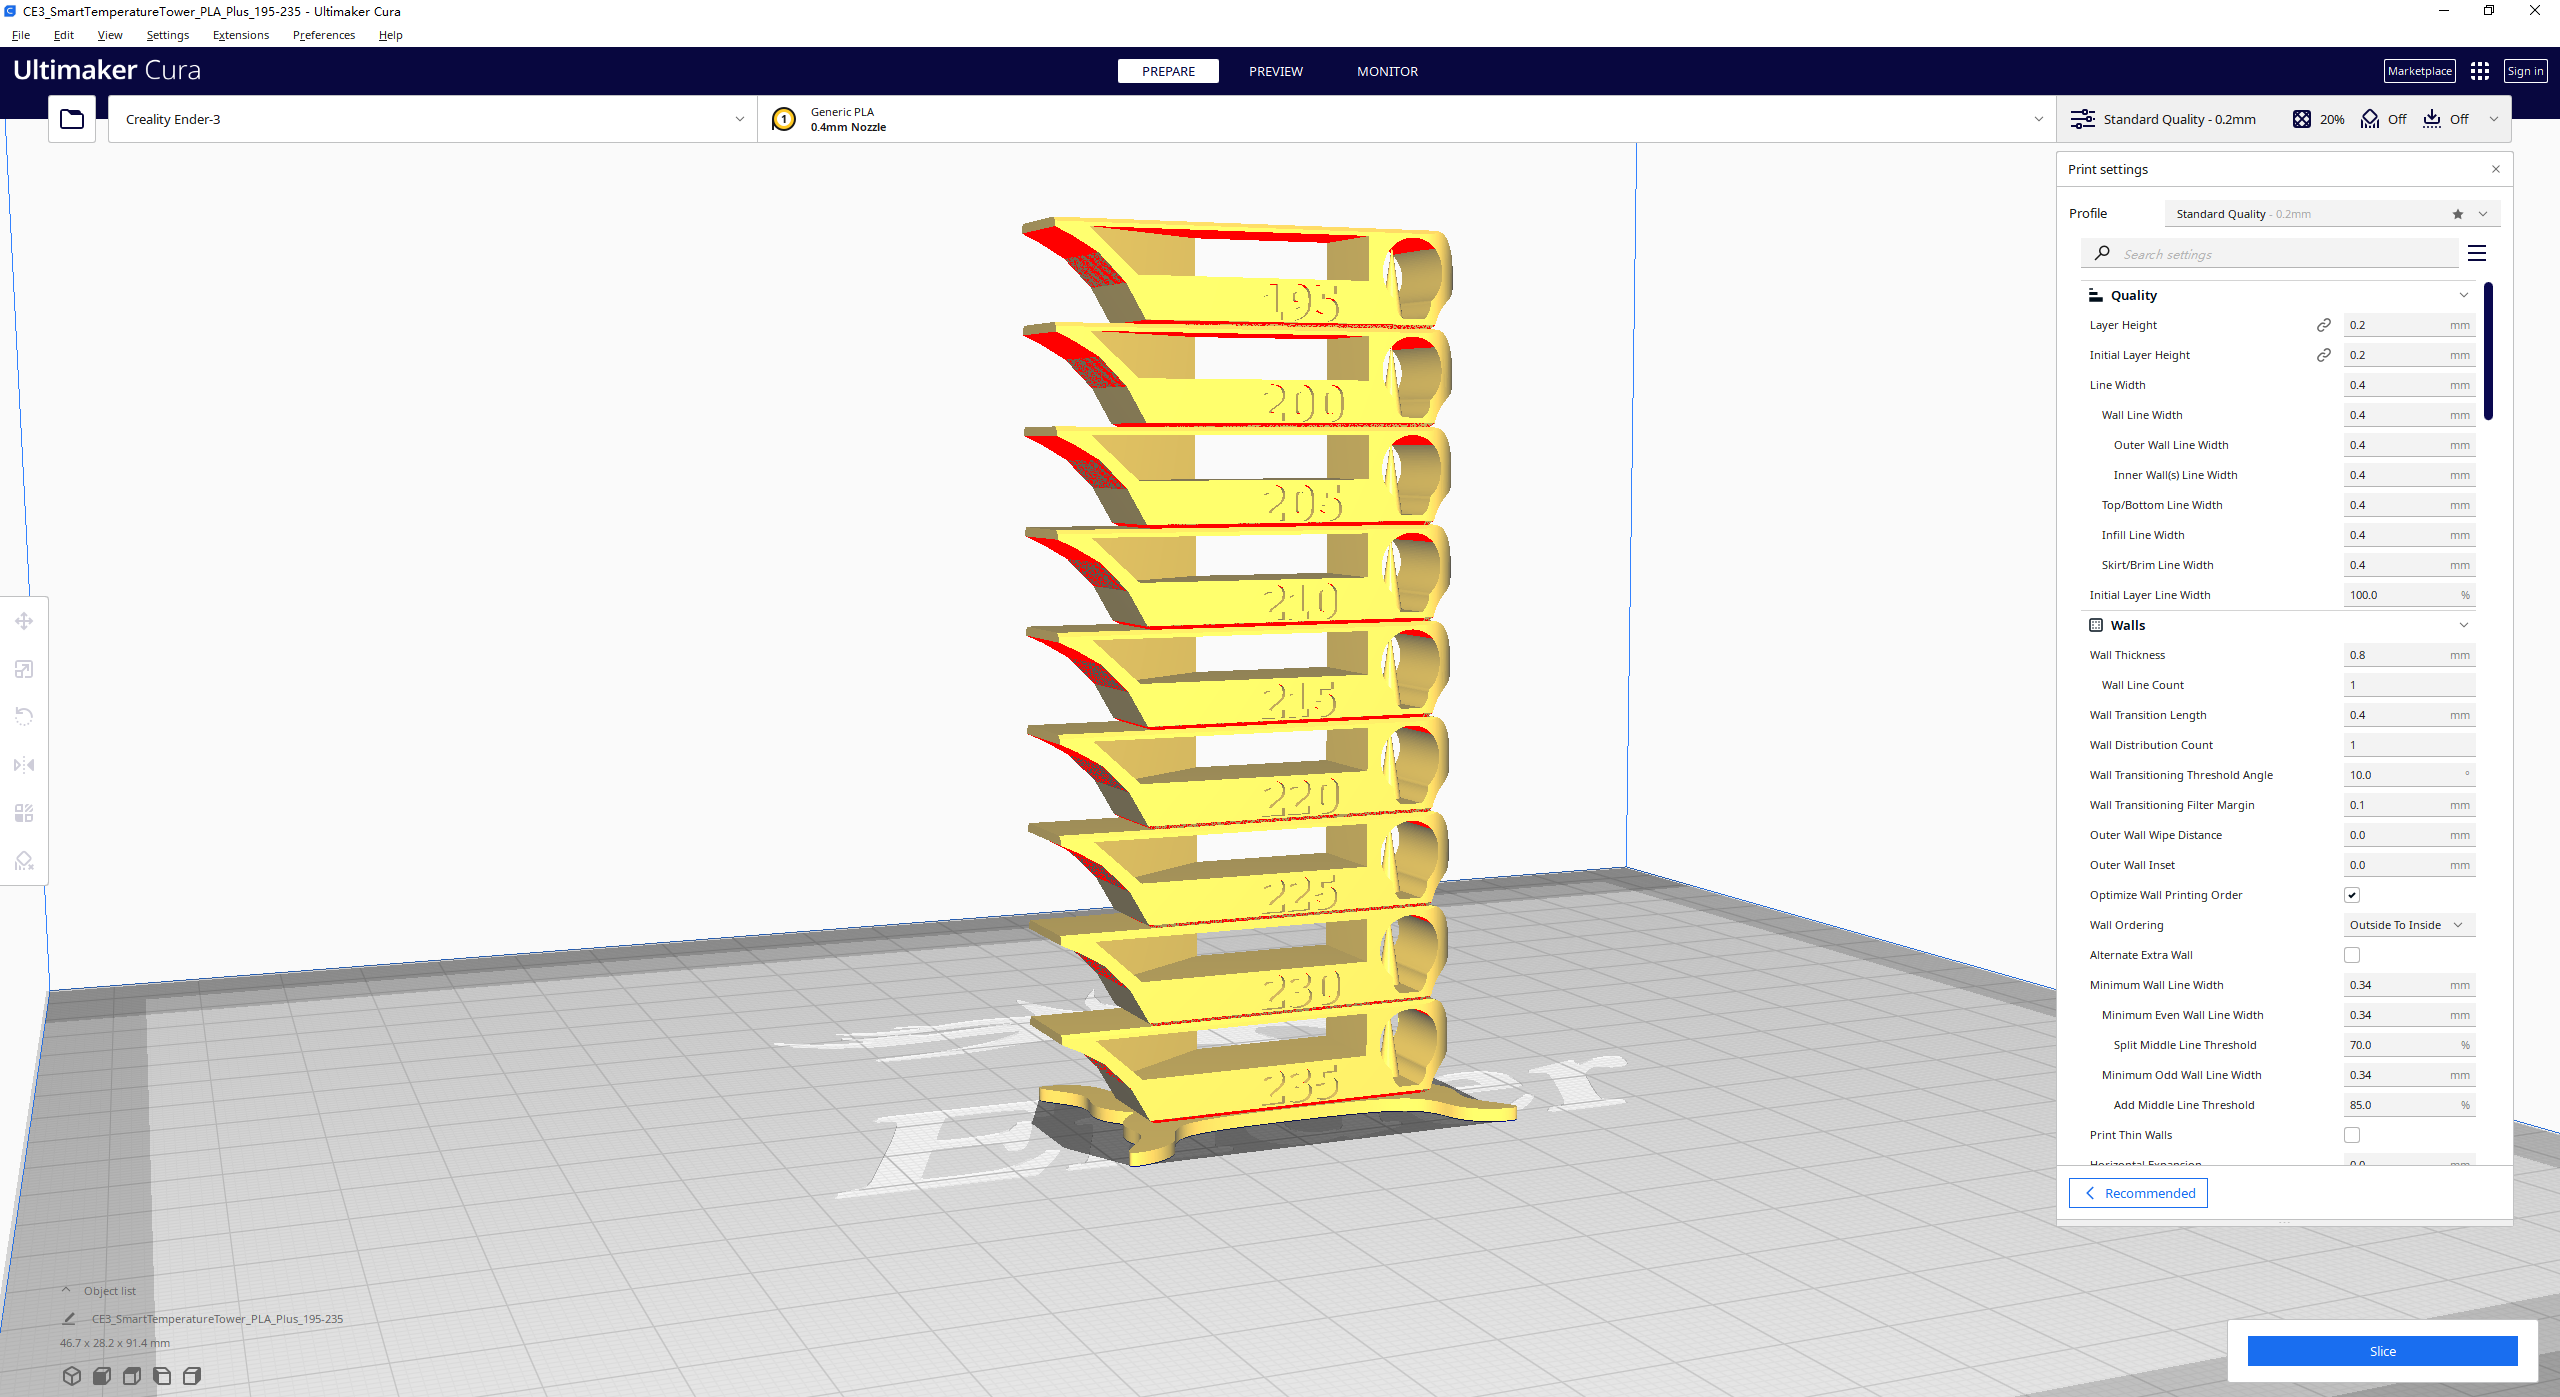
Basic setting
- Layer height: 0.2mm(You can set it to 0.1mm. It doesn't matter)
- First layer height: 0.3mm(You can set it to 0.2mm. It doesn't matter)
- Printing speed: 50mm/s+
- Travel speed: 150mm/s+
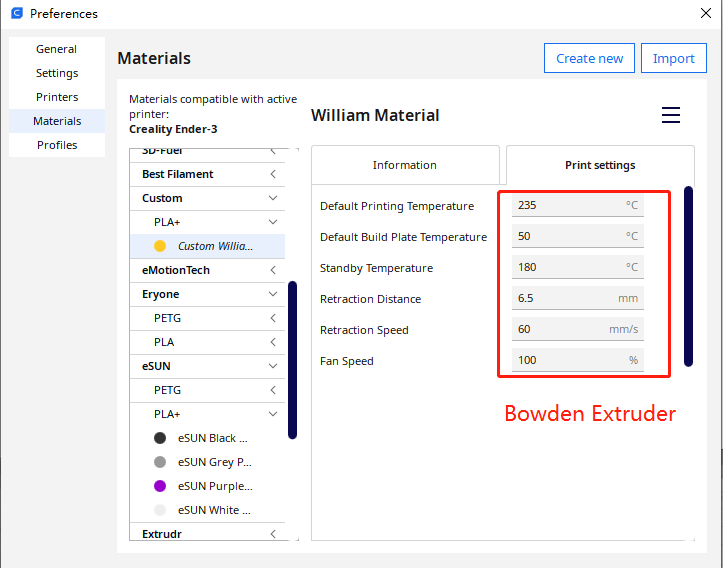
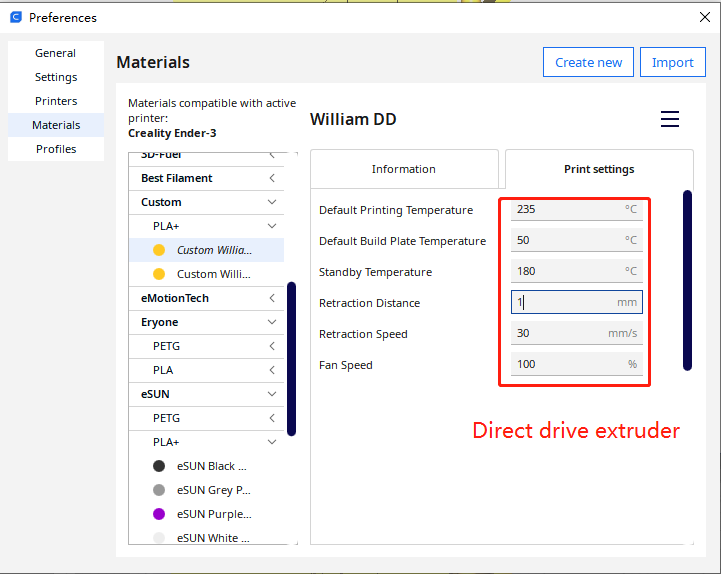
- Acceleration: Bowden extruder[1000-1250mm/s2] | Direct drive extruder[700-750mm/s2]
- Support: Disabled
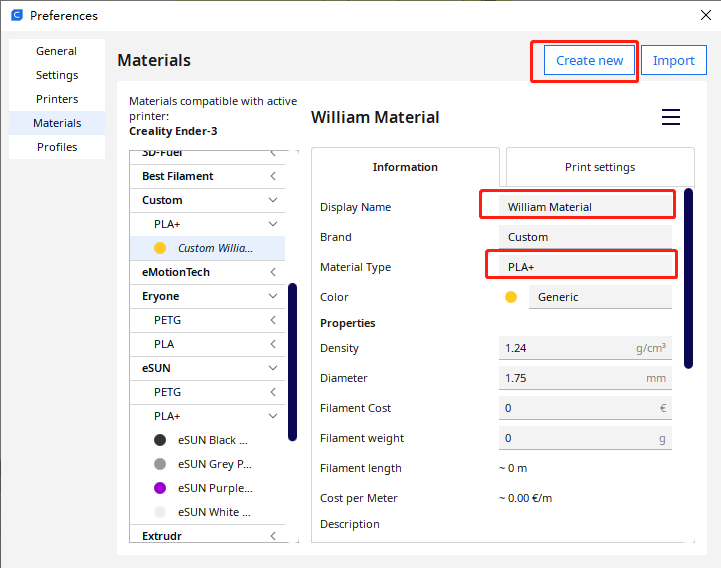
Note: We suggest you set the temperature setting and retract settings from the filament profile.
Temperature setting, slice, and export
When we finished loading the STL file then we can view the 3d model. We can see there are some numbers on the interface of the model.
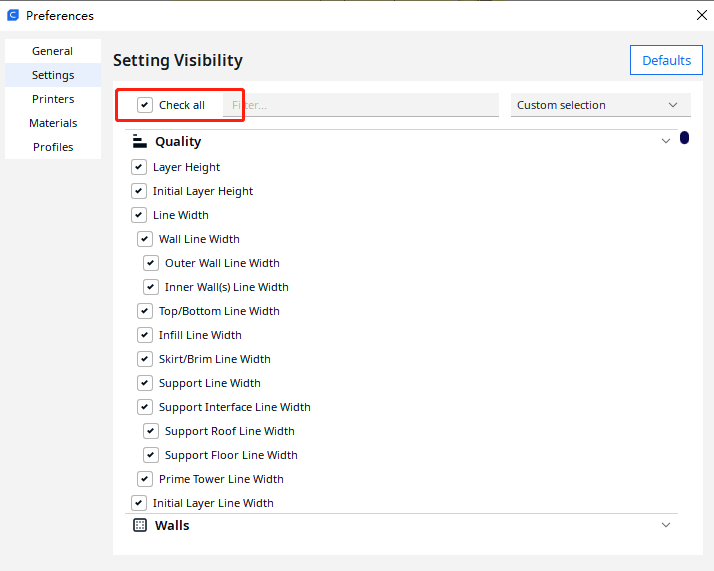
We can click"check all" to display all the settings on the profile
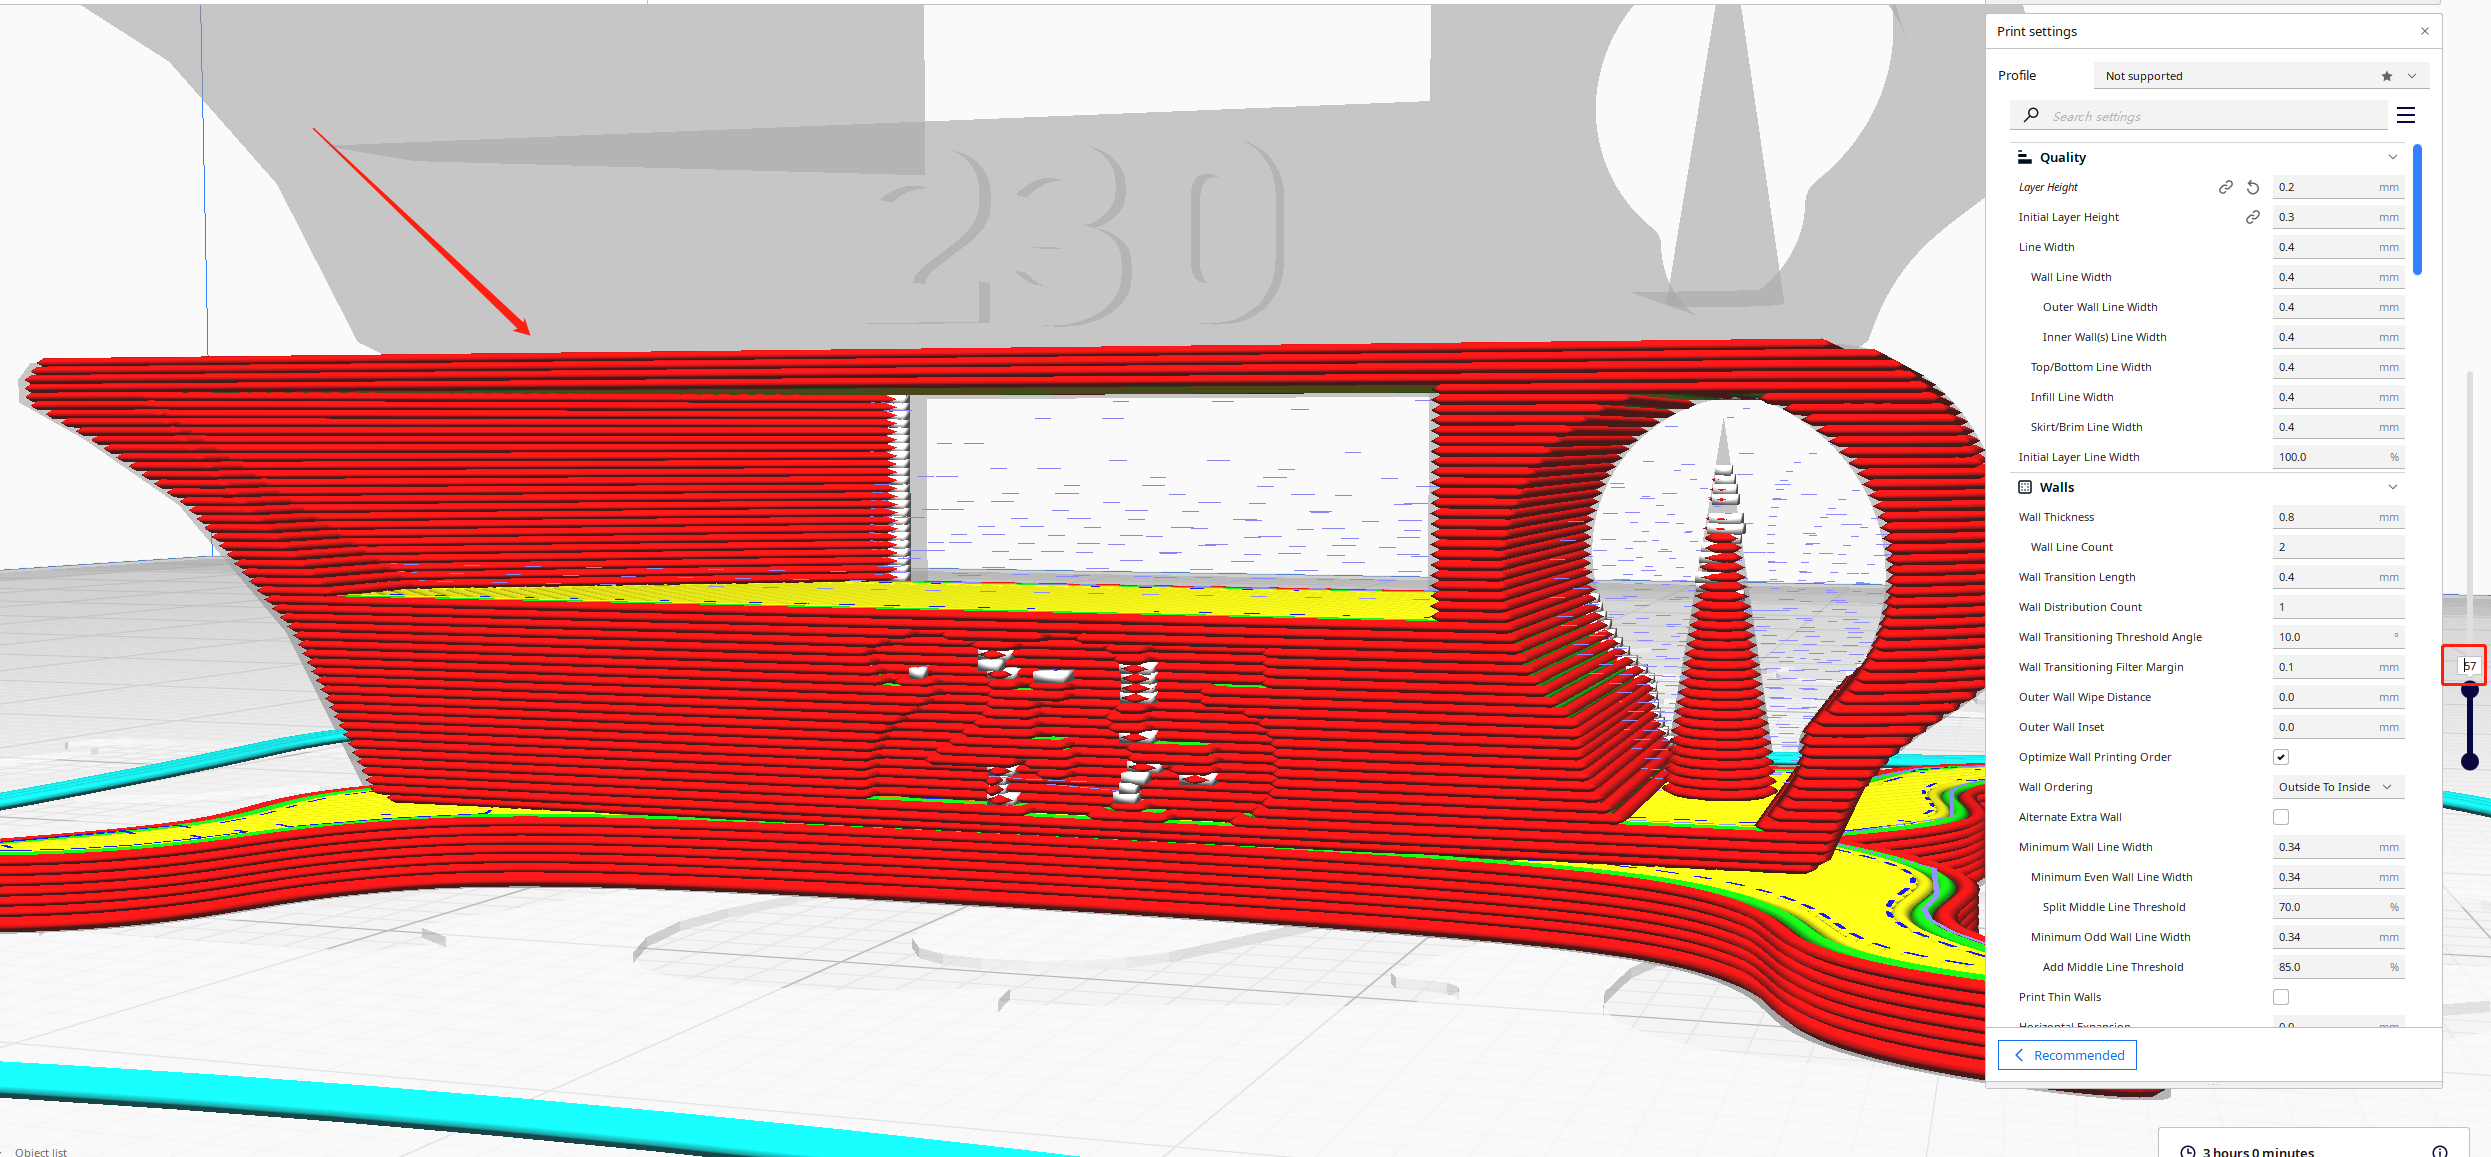
Click slice and move to the "PREVIEW" menu


Scroll down the height bar until the second ladder disappears completely(0.2mm layer height, 0.3mm first layer height. So the first point is 58)
Did it again so we get the result is 108
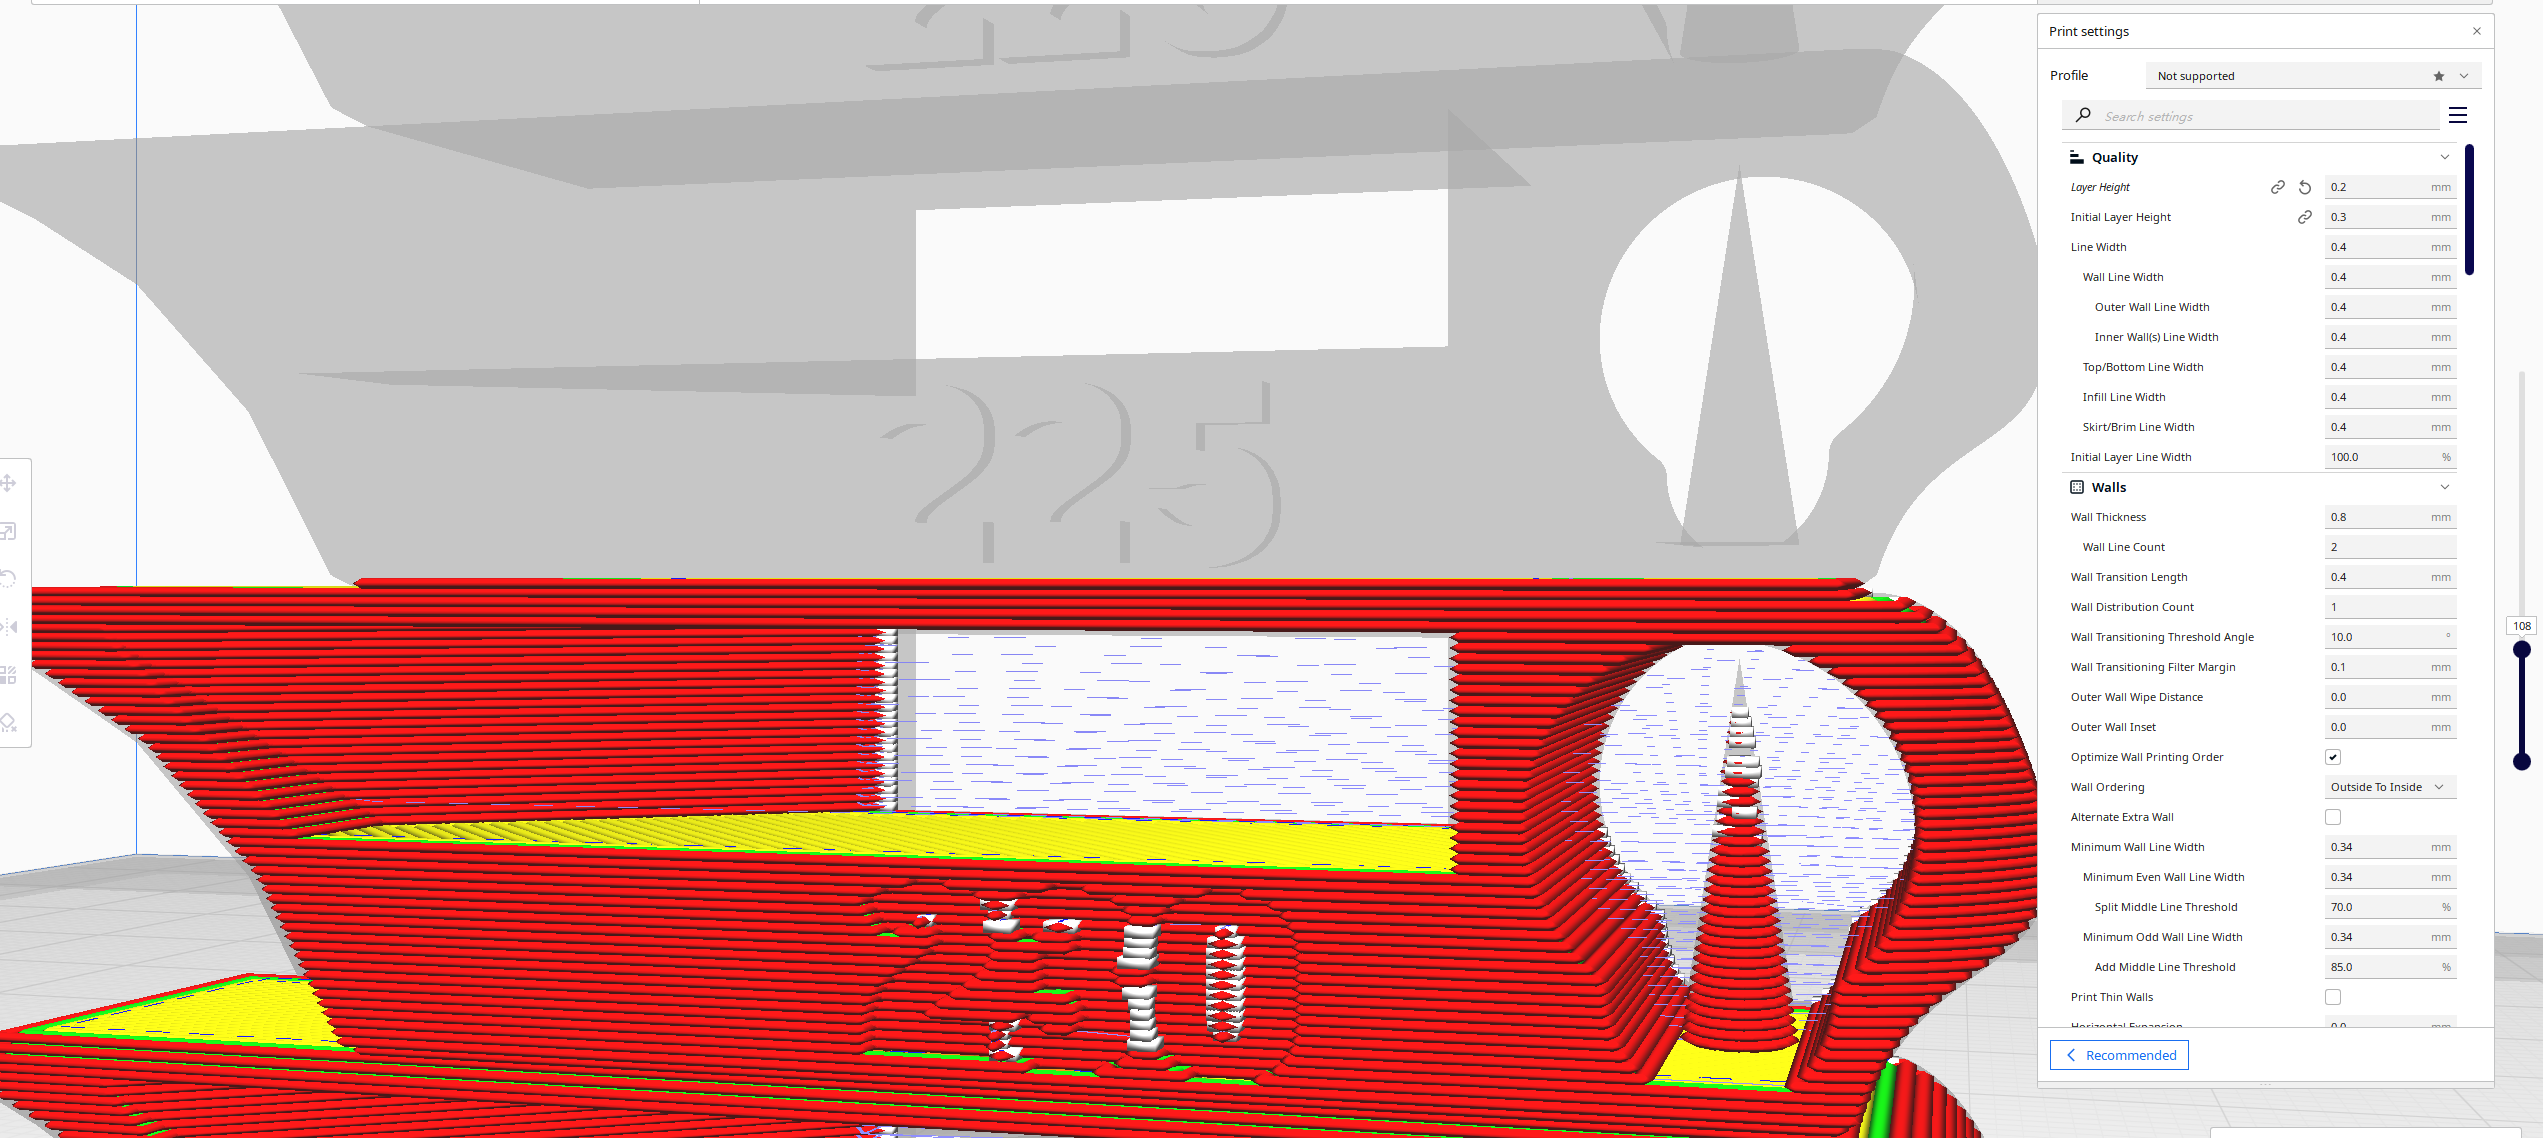
So we just need to repeat this step until all the change point numbers we have recorded.
This is the result of mine[230-195℃]:
Change-point Z height= First layer height+Layer height(Change-point number-1)
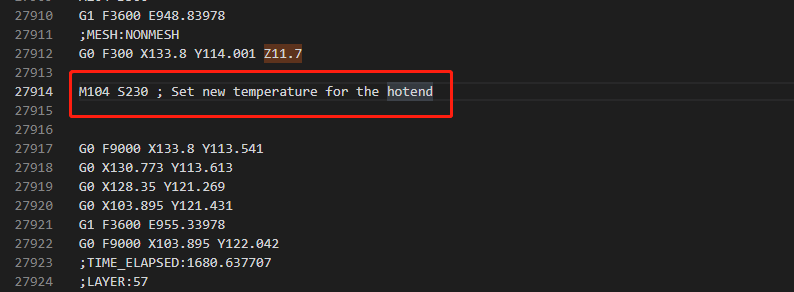
eg: 1st change point Z height= 0.3+0.2(58-1)mm=11.7mm
- 1st point: 58 layers (z=11.7mm)
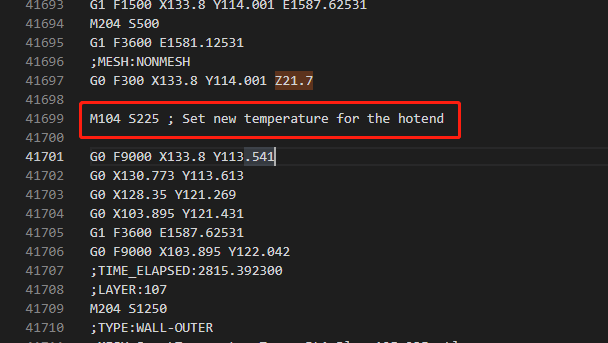
- 2nd point: 108 layers (z=21.7mm)
- 3rd point: 158 layers (z=31.7mm)
- 4th point: 208 layers (z=41.7mm)
- 5th point: 258 layers (z=51.7mm)
- 6th point: 308 layers (z=61.7mm)
- 7th point: 358 layers (z=71.7mm)
- Last point: 408 layers (z=81.7mm)
We have recorded these and then we just need to export the gcode to your disk.
Manual edit of the gcode
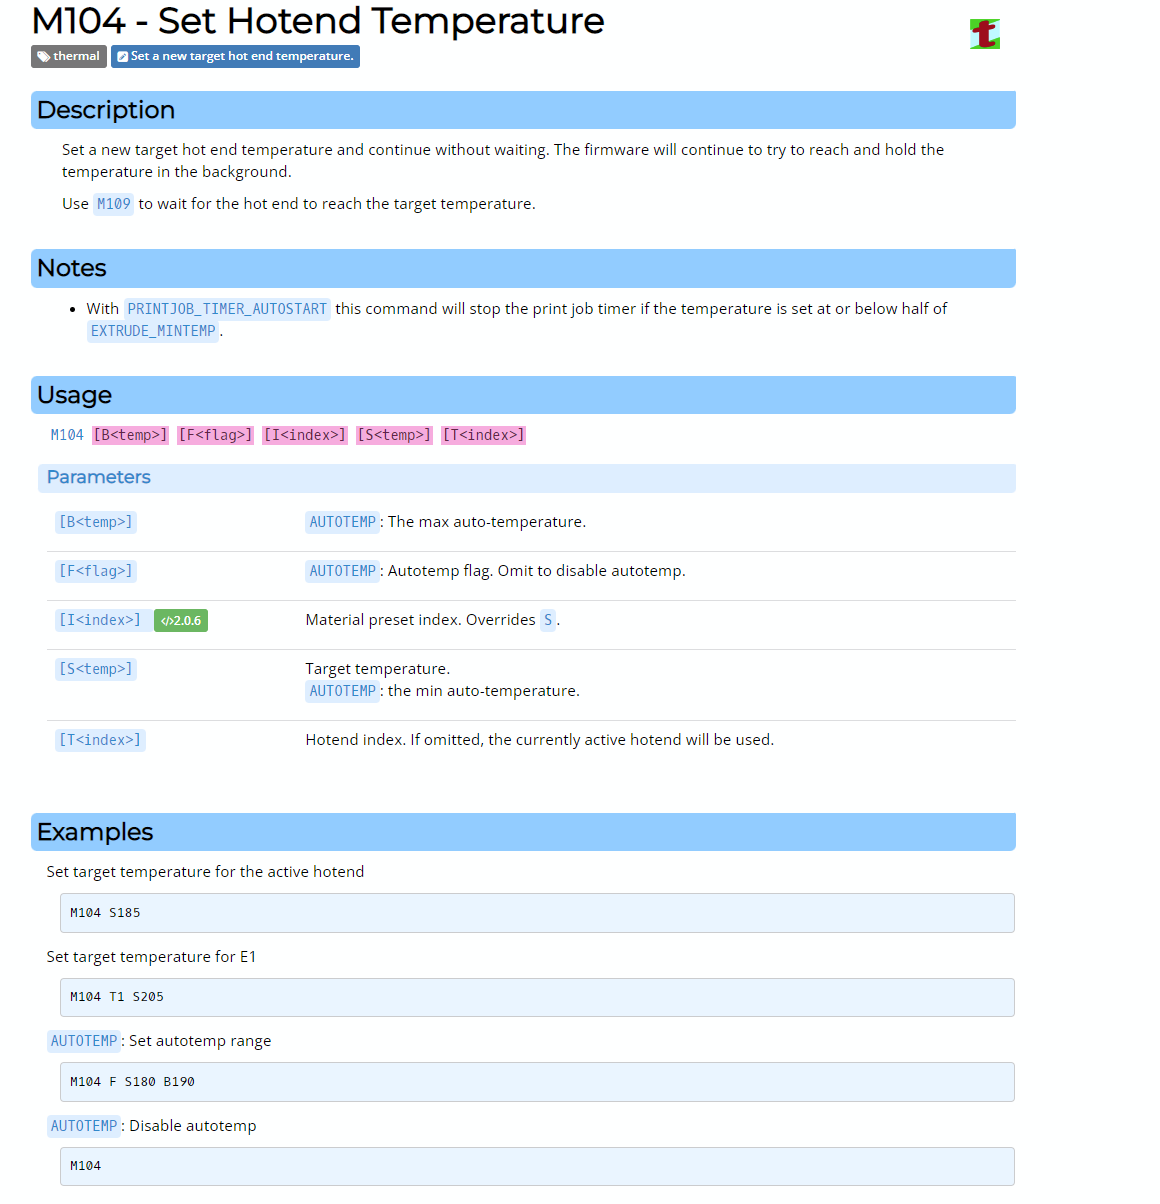
Go to Marlin's official gcode website then check the M104
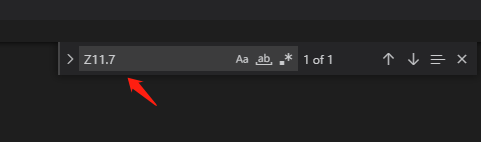
Open gcode with a text editor. Click "Ctrl+F" on your keyboard then input "Z11.7"
Insert M104 S230 I like using";" this symbol to add comments:)
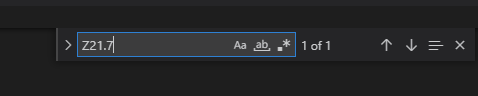
Then 2nd point"Z21.7"
Insert M104 S225
Repeat it again and again until you finished the edit. Click"Ctrl+S" to save the gcode
Now you have got the modified gcode. Copy it and throw it into your sd card. Then have fun with your test.
A few hours later you can get the result of printing.
Here is a pla+ temperature tower modfied gcode for ender3
Some pic of the result
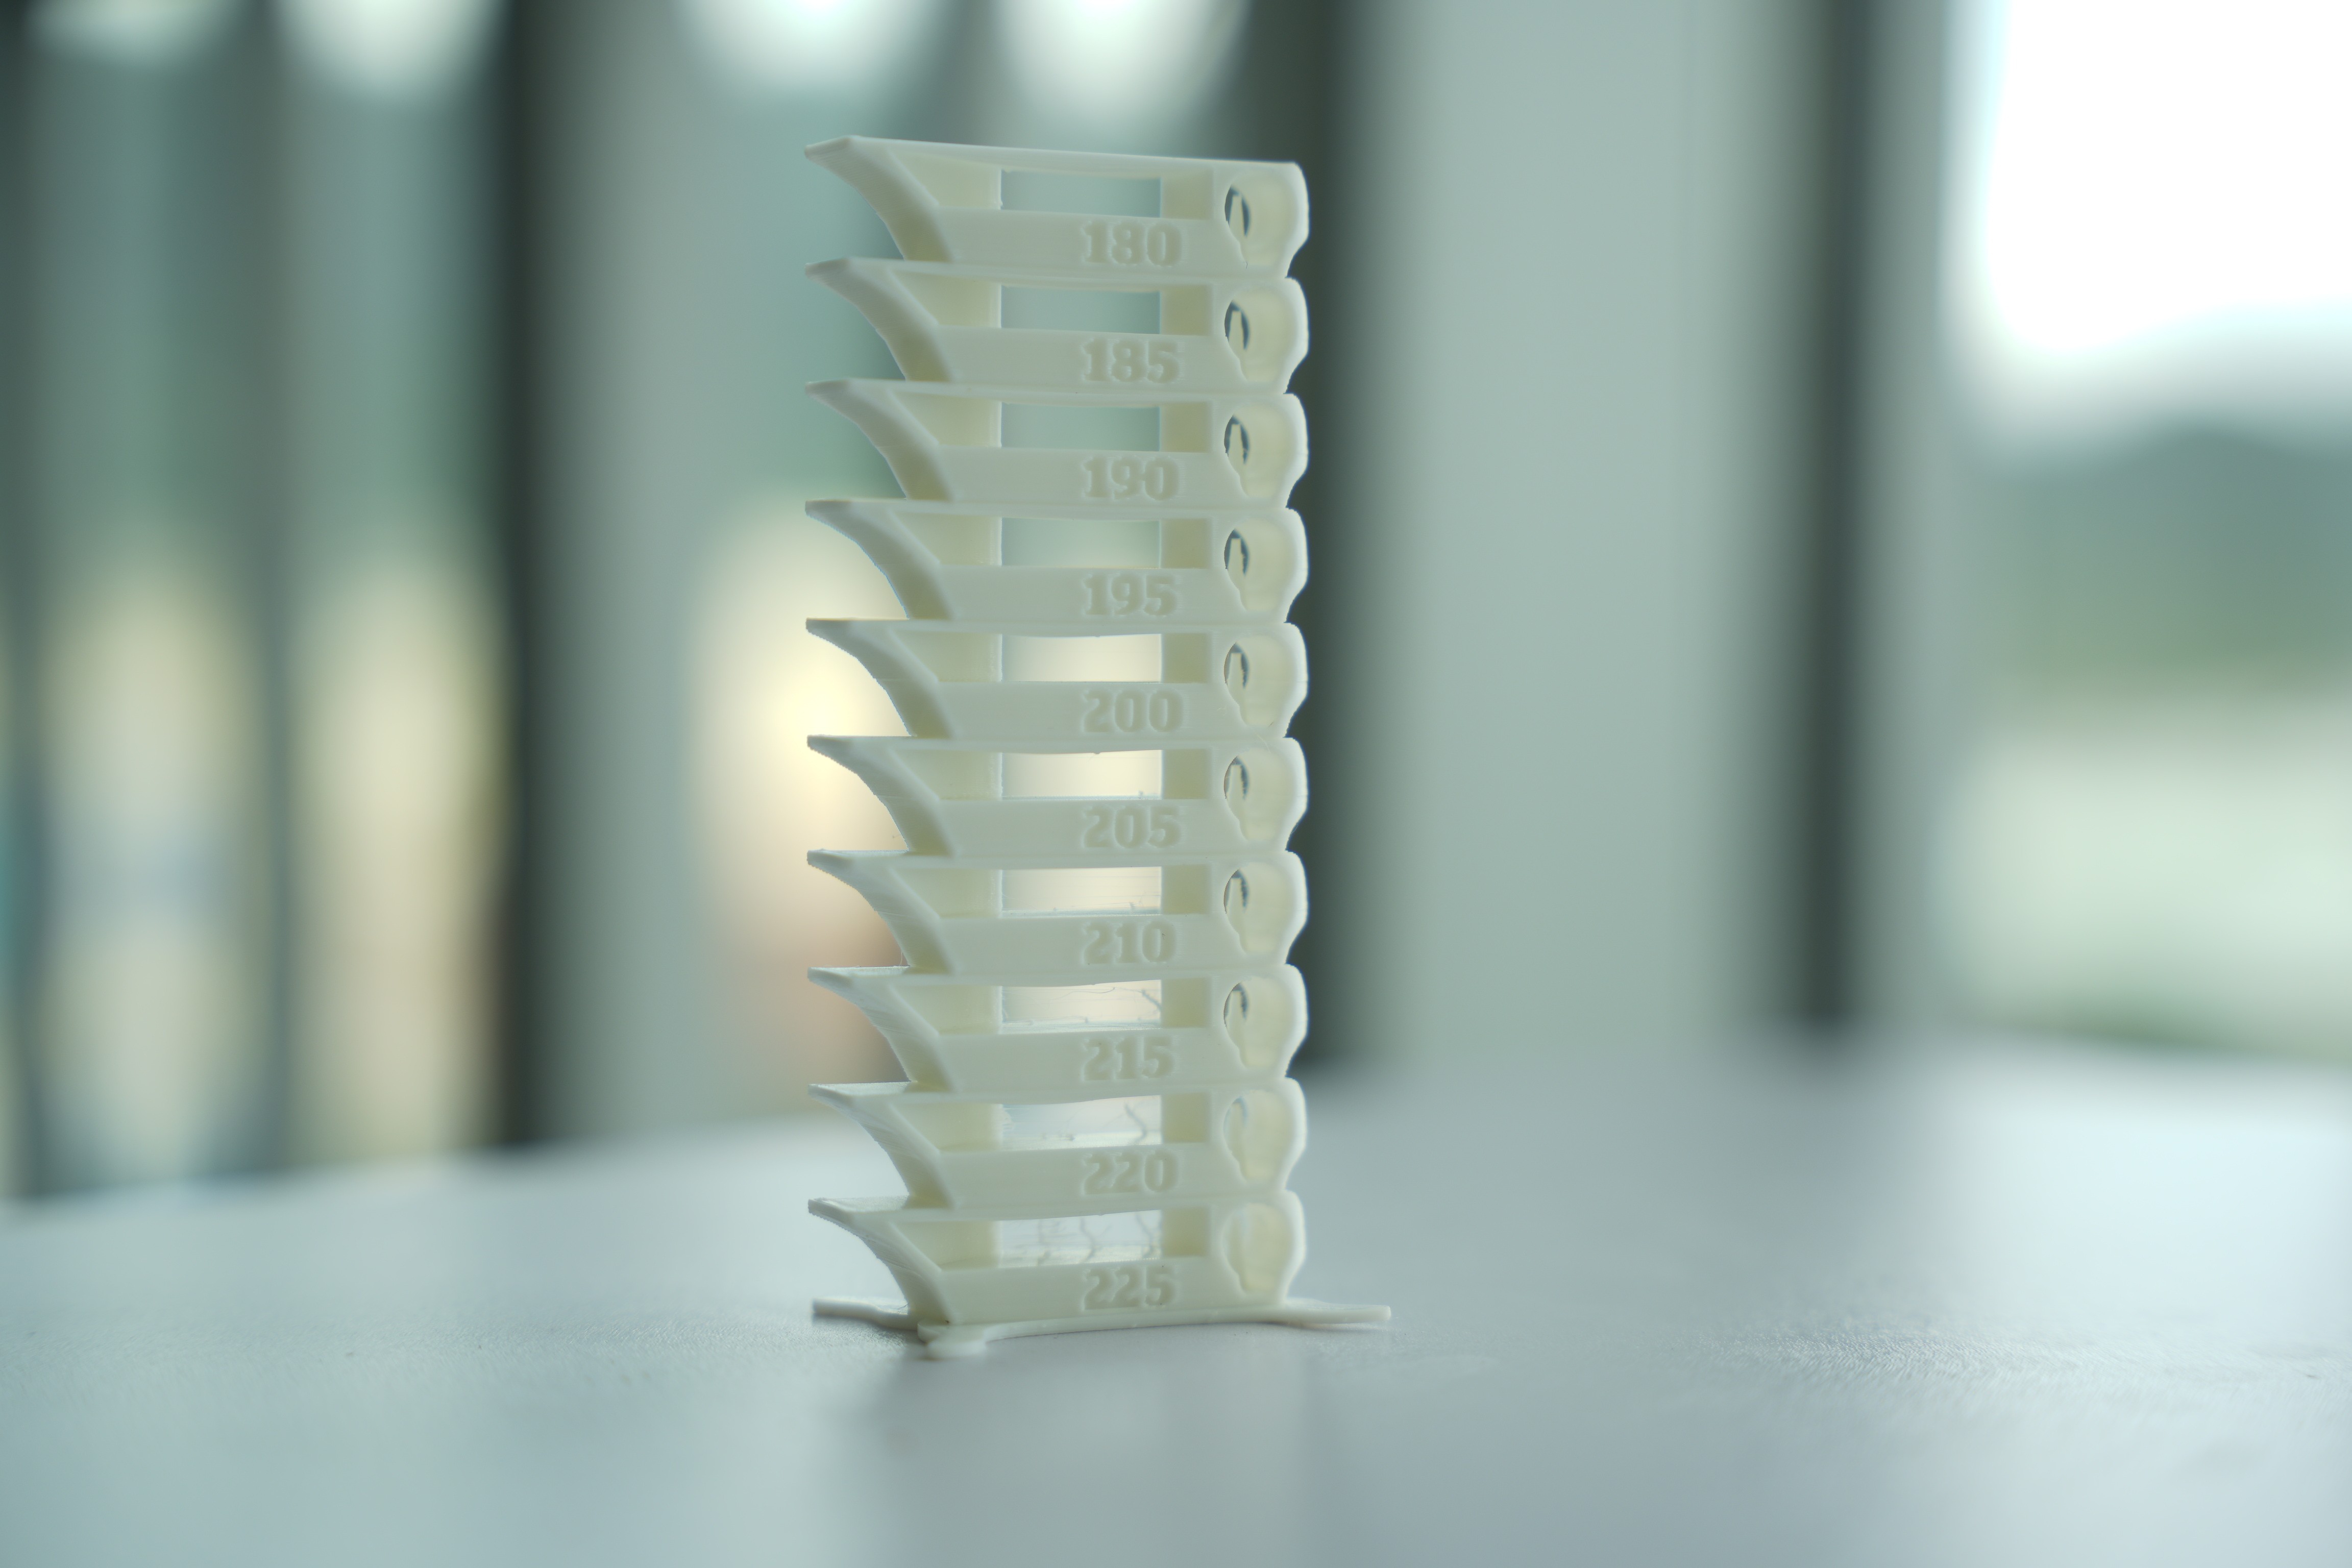
End